Interior Painting Procedure
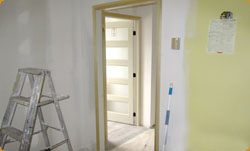
1. Any remaining furniture is moved to the center of the room. Then we lay drop cloths and apply plastic sheeting to protect your floors and furniture.
2. All entryways and openings are masked to keep dust contained. While we’re working, we’ll shut off the heat or A/C to prevent it from pulling dust through the rest of the house.
3. We remove door knobs, switch and socket plates, and any miscellaneous, easily removed hardware prior to painting. Anything that can’t be removed reasonably will be masked.
4. Walls and ceilings are examined using halogen lamps to help identify all imperfections so we can repair or spackle them as necessary. We repeat this between each coat.
5. Wall and ceiling surface imperfections (nail pops, holes, cracks, etc.) are repaired with one or two coats of spackling, depending on severity. For severe stress cracks, we apply fiberglass mesh-tape and feather spackle. Cracked corner beads are drywall taped and spackled; metal corner beads are re-screwed and spackled. We then pole sand the entire surface area to smooth out the spackling and remove any bumps.
6. Water stains, crayon and ink marks, etc. are sealed with an oil-based stain sealer to make sure they won’t bleed through the finish coat.
7. All woodwork is sand to smooth rough edges or imperfections. We then caulk the moldings wherever necessary, in places such as baseboards, doorframes, etc. Bare wood is primed accordingly. And we sand and dust all woodwork between each coat to promote better adhesion.
8. We spot prime spackled areas to prevent the paint from flashing when any type of gloss finish is used. And we spot prime bare wood areas to make sure the finish will adhere properly.
9. Finally we’re ready to paint: We apply the finish coats to walls, ceilings and woodwork. All cut lines between finishes or colors will be sharp and true.
10. After all work is complete, we’ll clean all work areas: dust, vacuum, damp sponge hardwood floors, and scrape windows. And we’ll return the furniture to its original location.
11. All surplus materials will be sealed or packed up and given to you for future maintenance. We mark each container with the date, color, type of paint, surface and room location for your reference.
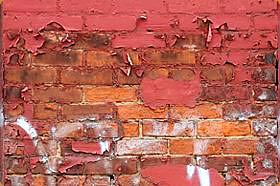
1. Work starts by power washing of all the surfaces to be painted a few days before the prep work begins, to give the surfaces time to dry completely. This removes any dirt, mildew, algae, and so on from the surfaces. We use a water/bleach solution that’s mild enough to prevent hurting your shrubs, plants or trees, but strong enough to kill any mold or mildew. For small areas, we hand wash the surfaces.
2. All adjacent areas are covered with drop cloths or plastic.
3. All wood surfaces being painted are scraped and sanded.
4. Any bare wood is primed with an oil-based, exterior primer. Any gaps, cracks, etc., are caulked.
5. Window sashes are scraped and sanded and any loose glazing is removed. We re-glaze sashes and reopen drain holes for storm windows as needed.
6. If we identify any wood rot that wasn’t apparent during the initial inspection, we’ll show it to you and get your approval on a change order before performing any additional repairs. We do minor wood rot repair with wood hardeners and epoxies. Minor repairs we’ll do ourselves; for major repairs, we may recommend bringing in a carpenter.
7. Additional surface preparation:
- exterior stucco: any loose paint is wire brushed.
- exterior aluminum: we don’t sand unless the surface was previously painted. If needed, we add Emulsa Bond to the finish coat; this aids in adhesion to chalky surfaces.
- exterior asbestos: we don’t sand. The pressure washing process usually removes any loose paint.
- exterior clapboard siding: any loose paint, sand all the boards, etc. are scraped.
8. Upon completion of the project, we clean the property; we make sure no scrapings or debris is left lying around the grounds.
9. All surplus materials will be sealed or packed up and given to you for future maintenance. We mark each container with the date, color, type of paint, and surface location for your reference.
Pressure washing is a terrific way to remove dirt, mold, algae and mildew from exterior surfaces and decks. And it’s one of the best ways to make sure that new paint will adhere properly to your home. In fact, pressure washing is the first step in our exterior paint job procedure.
Pressure washing can also revitalize your home or siding, removing the dirt or deposits that are hiding its beauty. And it can remove the mold and mildew that will quickly damage your home’s finish if left untreated.
Surface preparation is essential for every great paint job. In fact, proper surface preparation is even more important than the painting itself.
During surface preparation:
- We repair the sheetrock before any interior paint job. We resecure and spackle all nail pops, spackle nail holes, and retape the drywall seams and stress cracks as needed.
- We scrape and clean loose paint, prime all exposed surfaces, and caulk all cracks.
-We rustproof where applicable.
Want to do the painting yourself, but aren’t comfortable with the preparation? Give AndrePainting a call: we can prepare your walls for you, and leave you with a perfect surface, ready to paint.
The name pretty much says it all: AndrePainting. We do painting. We do a great job at a terrific price. And we offer a wide variety of custom finishes for interior and exterior surfaces.
Some woods are just too pretty to hide under a coat of paint. For them, AndrePainting offers top quality stains for all interior and exterior surfaces (where applicable). And we can finish that off with a high quality, clear finish to give your woodwork a rich, luxurious finish that’ll last and last.
We offer multi-spec (multicolor) finishes in a wide variety colors. This finish is a very durable, washable and great for high traffic areas.
Wallpaper is another great way to change the look of your home. At AndrePainting, we can wallpaper whole rooms, or just single walls to provide a unique and interesting accent.
To bring a new look to a room that’s been wallpapered, first you have to remove the old wallpaper. AndrePainting can remove the old wallpaper using our safe and effective wallpaper removing solution.
Then we renew the surface area to like-new condition, so it can be painted, wallpapered, or receive a custom refinish.
Services
- Interior & Exterior
- Residential - Commercials - Industrial
- Pressure washing
- Wallpaper removal
- Drywall & stucco repair
- Painting of Aluminum & Vinyl siding
- Deck cleaning & staining
- Cleaning eaves
- Colour consultation
- Concrete & Epoxy
- and many more...
- Derek, Mississauga, ON
March 29, 2012
“I'm really satisfied with AndrePainting contractor. I always get nervous when hiring a painting company, because I want to be sure the job won't go over budget. All I can say is Andre was courteous and professional, and yes, within agreed resonable budget.”
- ....
- Happy and satisfied with my service?
If you feel I exceeded your expectations, feel free to send me a message.
Thank you.